


This is the first of a planned (brief) series on the salvage of a Rearwin Speedster - one of these chaps:
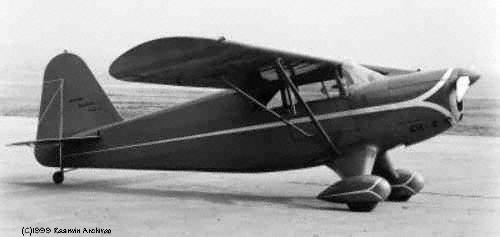
The wiki page on the Speedster is HERE and it tells me that there were only about 14 of these single seaters ever built - around 1930 onwards.
But I'm getting ahead of myself...
...I love the trash and treasure evening, but this year had vowed not to buy any unwanted airframes, after some VERY mixed results when I did so in previous years. I was doing well until the end of the evening, when Mr David Pound, who hadn't secured a single bidder for a largish heap of scrap balsa framing and plastic bag, pleaded with me to make him an offer to avoid him loading the remnants back into his car. I reached into my pocket, had 65 cents in change (I wasn't splitting a note for this) and the deal was done. I have no idea, yet, which one of us was the Patsie in this transaction. He seemed unusually happy to have cleared some space in his workshop though!
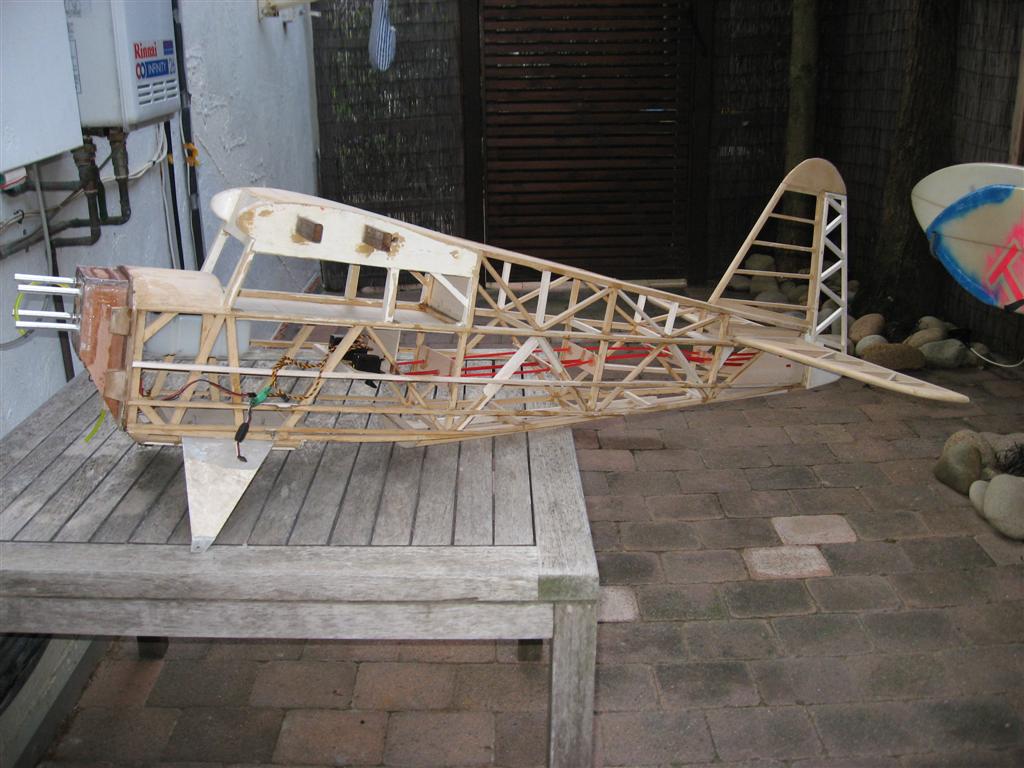
What I had purchased was a quarter scale (ie 8 foot wingspan in old money) airframe of a Speedster that appeared to have flown and, certainly, had been finished, covered, and subsequently stripped for repair. I think it was originally from a kit, built by someone with an eye for detail and very good building skills, had passed through several pairs of hands, before being stowed in Dave's garage. Rough assembly gives me a plump little aircraft with 96 inch span which, next to my 84 inch Cub, has the appearance of a lifetime spent eating too many pies. The Cub isn't, exactly, streamlined, but it looks like a racing snake next the the Speedster.
On closer examination (and it took me a few days to pluck up courage), the tail was broken off, the rudder was missing, there was quite a lot of damage to the frame, wings etc, and a nasty case of, well, woodworm?
If this was what you picked up after a crash at the field, there is no way on earth you'd be trying to rebuild it. So why am I? (There isn't a right answer here - by the way.)
Anyway, the wonders of thin CA had the old girl back into alignment, and I set about replacing, strengthening and a little bit of modifying. I'm using a range of glues on this. The old wood is VERY dry, which means that I need to use glues that will adhere and flex, so there is some PVA, some epoxy (varying drying times), some CA, and quite a bit of light strengthening going on.
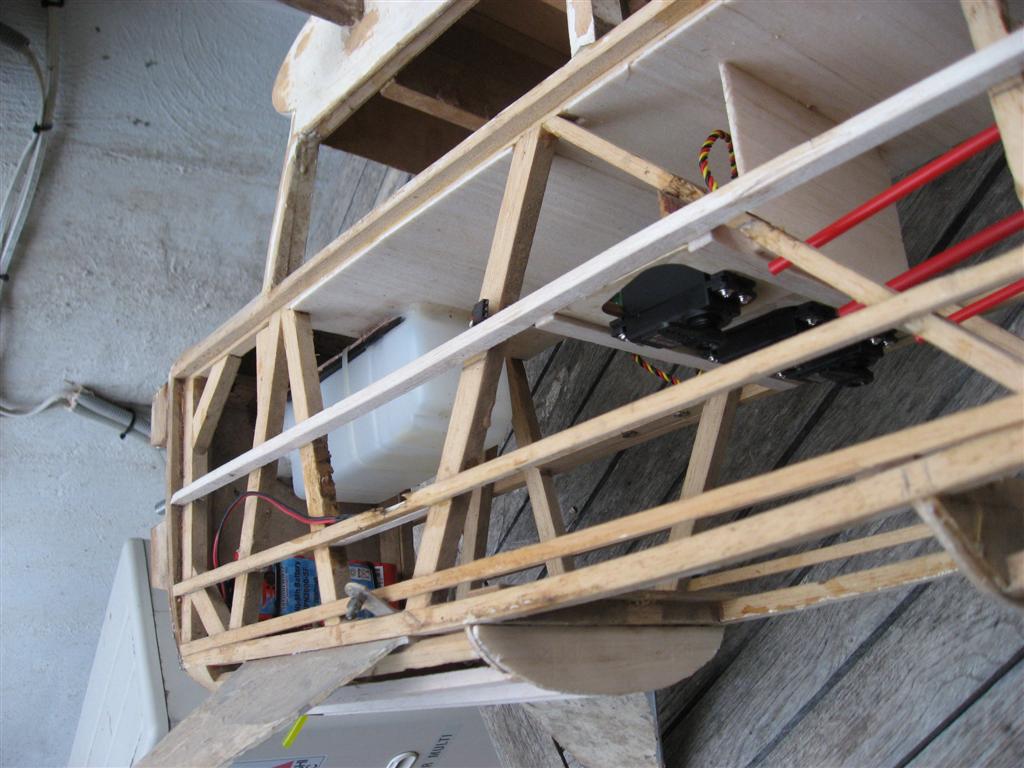
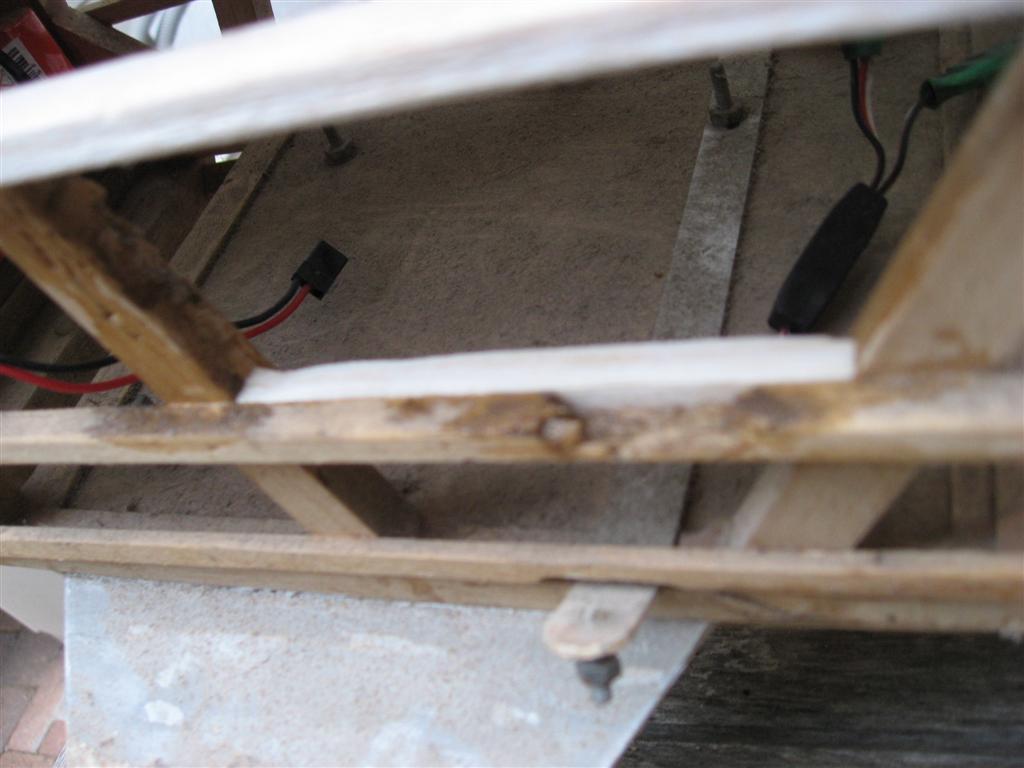
She appeared to have had a single elevator servo working the elevator (two parts joined by a hardwood beam) but, given she'll weigh 7kg or thereabouts, I have set it up to have a servo dealing with each elevator surface, one for rudder (all these Hitec 645s with metal gears). No problem fitting them in!
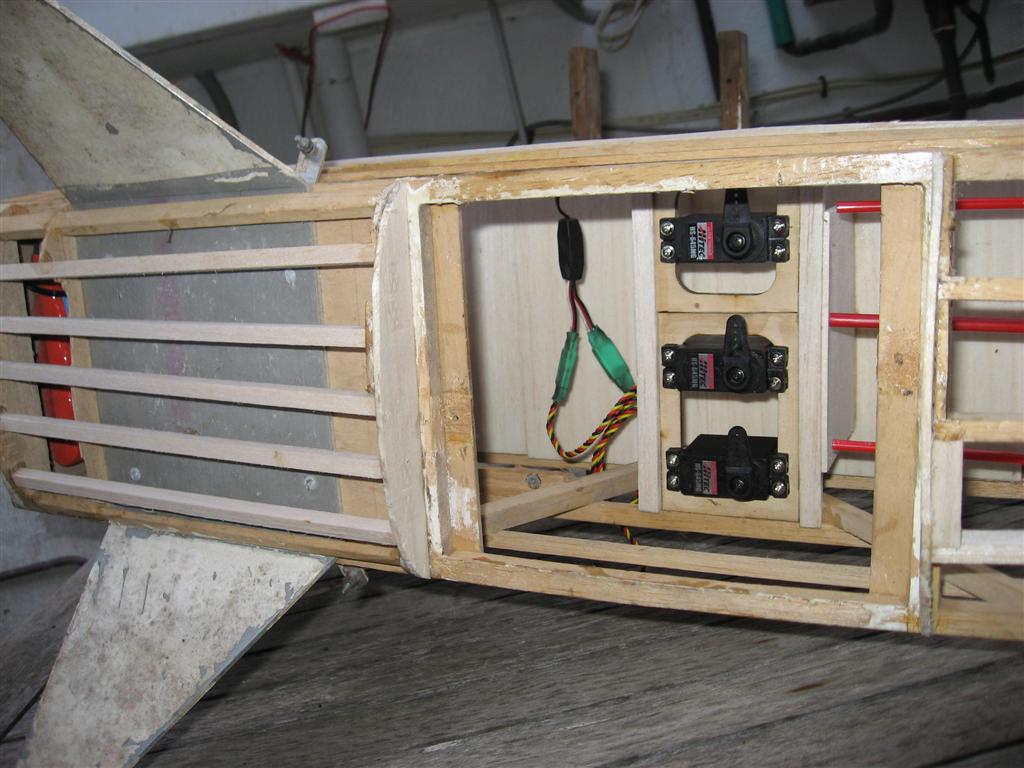
and I'll also be putting a strong metal gear servo on each aileron (it appeared that she might, originally, have had a different setup - but installing two, now, is easy). Throttle will be a standard servo, and another for choke (plus, maybe, one for ignition).
The motor will be a 26cc petrol - RCG - with a 4.8 volt battery upfront to power the spark, and a large 6 volt battery pack behind the firewall to power the radio gear. I've chosen this motor because, although on the gentle side for a model of this scale, some of the original full size examples flew on little 70 horsepower units, and I do want to keep things looking real.
I've pushed out the motor by 5.5cms (to fit with the cowl - mercifully repairable), keeping the standoffs as short as possible and building a new ply box to hold it - glued and screwed, then taped and "painted" with epoxy down all edges. The motor was fitted to the standoffs, then the whole lot to the ply plate, then the motor removed - apparently this avoids putting alignment strain on the crankcase.
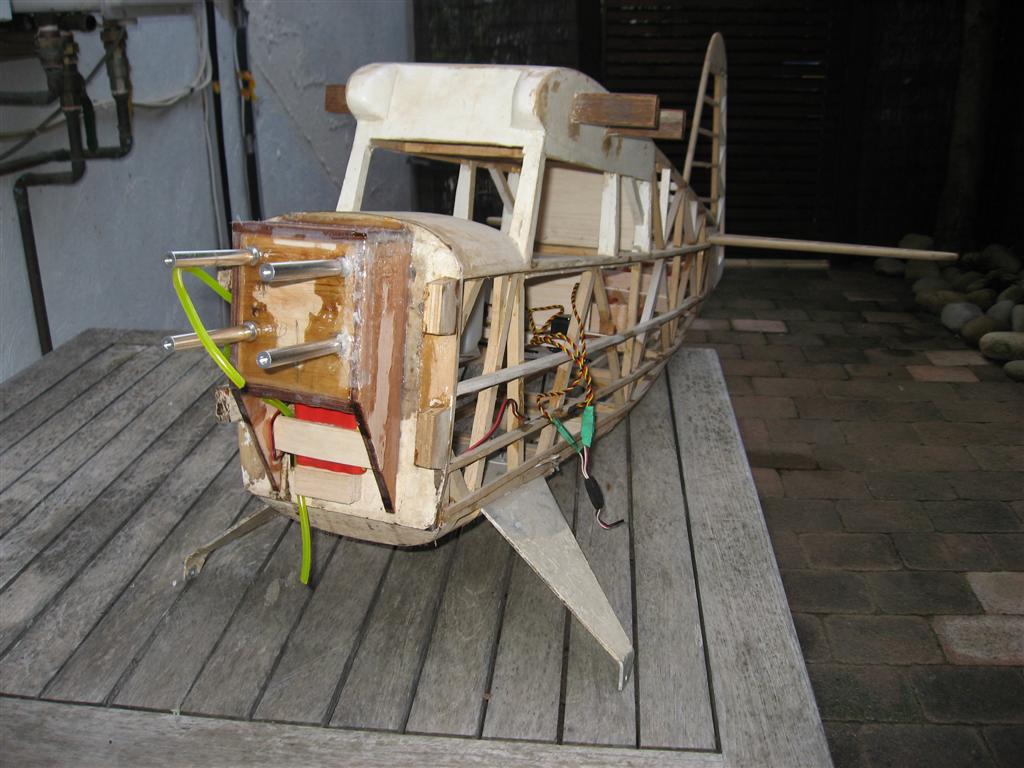
The tank has just gone in, as has the cockpit liner and the control rod outers (supported, often, down the long fuselage), and I am getting closer to the sanding stage for the fuselage.
A new rudder has been made and hinged (all hinges are also pinned with cocktail sticks prior to covering).
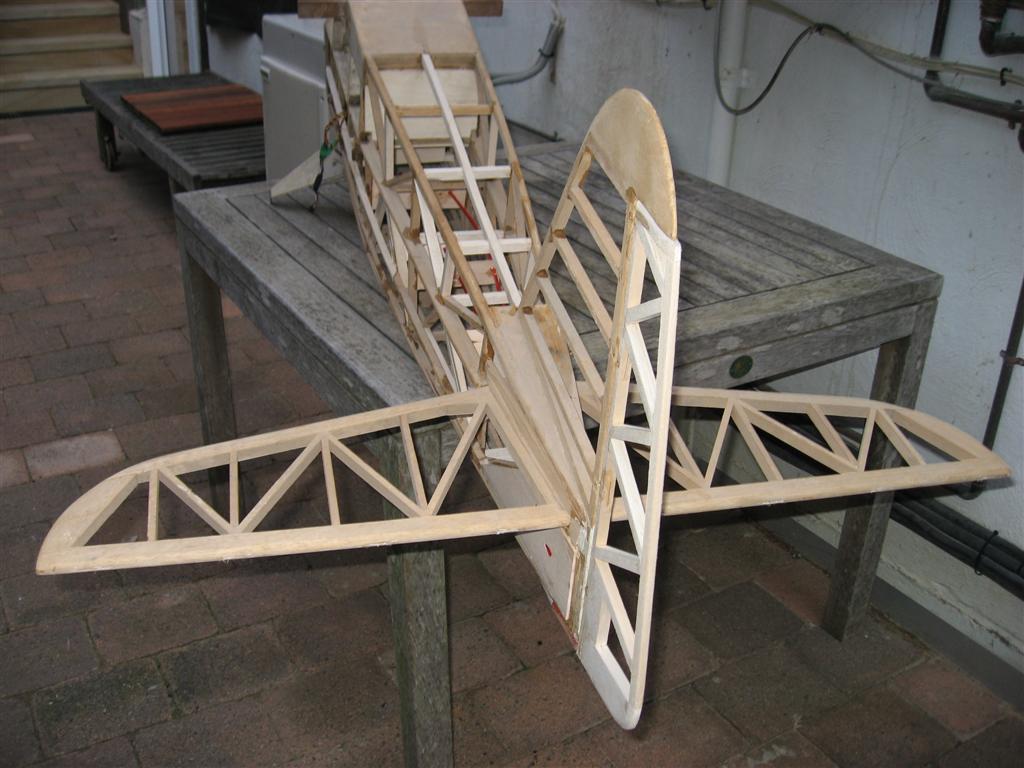
When I get to the wings, I'll be adding in some extra strength with aluminium tubes (inners and outers) through the upper fuselage and into each wing. You'll see that the current setup relies on small hardwood stubs and then some underwing struts which will need to be very functional. Now I'm not an expert on this sort of thing, but I reckon this type of airframe would need to be capable of handling at least 6G, even if only in emergencies. That equates to a load of about 42kg (ie the weight of a small adult spread over the wings) which, by my reckoning, is more than the little stubs and struts should be asked to deal with. I'm not planning to subject this thing to 6G manoeuvres, but I do want to know that it is strong enough to get out of trouble, without adding too much weight, if it ends up upside down or in a spin.
Col Buckley is amazed that anything has risen from the original pile of bits (I should have taken some photos) and reckons the finished thing will be a "beautiful show pony" and, for my flying preferences "as boring as bats@&t". I'll be happy if she flies, but I reckon the boring bit might just be too true!
There's a lot of time to go into this, and it is a sobering thought that the 3 servos in the fuselage cost more than 200 times the cost of the airframe. The covering material will be a pricey one too, so the 65 cents, on a whim, might still hurt me, but it's nice to get back to some proper building and, with luck, she'll fly at the Autumn Scale Day.
And the woodworm? Dave has a feathery bird, by all accounts, that likes pecking balsa. Here's an example, now filled with glue and reinforced.
I reckon Dave can keep his pecker to himself!
The good thing is that this is a BIG fuselage - easy to add repair sections, get my hands in to fit things etc.
Part 2 - wings, trial assembly, etc, to follow in the fullness of time. I'll also cover the large model inspection process (although I do intend to keep things light) once Dave has got over the above comment, given he'll be inspecting the Speedster.
Clive